Legs Up The Wall Pose is a gentle and restorative exercise designed to promote relaxation, improve circulation, and enhance flexibility. Commonly used in yoga and recovery routines, this position involves lying on your back with your legs extended vertically against a wall. The simplicity of the movement makes it accessible to beginners while still offering a wide range of physical and mental benefits.
The primary focus of Legs Up The Wall Pose is overall mobility and recovery. While it is not a traditional strength exercise, it plays an important role in maintaining flexibility and reducing muscular tension. The pose primarily affects the hamstrings by placing them in a lengthened position, helping to improve flexibility over time. It also gently decompresses the lower back, providing relief from tightness and discomfort often caused by prolonged sitting or standing.
Secondary muscle groups include the abdominal muscles and stabilizers, which help maintain alignment, although they are not heavily engaged. The passive nature of the pose allows the body to relax, making it particularly useful for recovery and stress reduction.
One of the main benefits of Legs Up The Wall Pose is improved circulation. Elevating the legs encourages blood flow back toward the heart, which can help reduce swelling and fatigue in the lower limbs. This makes the exercise especially beneficial after long periods of standing, walking, or intense physical activity.
Another important benefit is its calming effect on the nervous system. By combining a supported position with slow, controlled breathing, the pose promotes relaxation and can help reduce stress levels. This makes it a valuable addition to both physical and mental recovery routines.
The pose also supports gentle stretching of the posterior chain, particularly the hamstrings and lower back. Because the stretch is passive, it allows the muscles to gradually release tension without the need for forceful effort. This can improve overall flexibility and reduce the risk of strain during more dynamic activities.
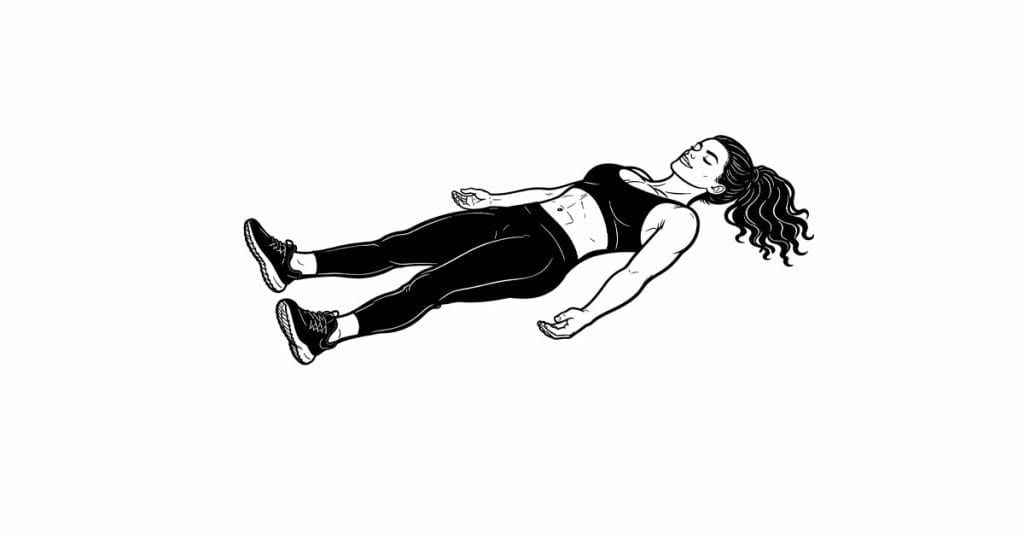
To perform Legs Up The Wall Pose, begin by sitting close to a wall and carefully lie back while swinging your legs upward. Adjust your position so your hips are at a comfortable distance from the wall, then allow your arms to rest at your sides. Focus on slow, steady breathing and let your body relax into the position.
Proper technique emphasizes comfort and relaxation rather than strict form. The goal is to allow the body to settle naturally into the pose, avoiding unnecessary tension. Small adjustments in hip position can help tailor the stretch to your individual needs.
Common mistakes include placing the hips too close to the wall, which can create excessive strain, or keeping the legs tense instead of relaxed. These errors can reduce the restorative benefits of the exercise.
From a safety perspective, it is important to listen to your body and avoid forcing the position. If needed, use a cushion or support under the hips to improve comfort. Exiting the pose slowly helps prevent dizziness or discomfort.
Overall, Legs Up The Wall Pose is a simple yet powerful exercise for promoting relaxation, improving circulation, and enhancing flexibility. Its accessibility and restorative benefits make it an excellent addition to mobility routines, recovery sessions, and daily wellness practices.